Your home & your
new EV charger
Congratulations on your decision to buy an electric vehicle. Before your charger (wall box) gets installed, there’s one thing worth understanding: your home’s electrical system was designed long before your car needed to plug into it. This guide explains what that means in plain English — no jargon, no scare tactics, just the facts.
What your home starts with
before the charger
Most Cape Town homes run on a 60 amp, single-phase supply. That’s the total capacity available to everything in your house simultaneously — lights, appliances, your geyser, everything. Once you add an EV charger, the competition for those 60 amps gets serious.
Even before you switch anything on deliberately, your home is already consuming power in the background. Let’s count it down:
Your 7kW EV charger draws approximately 30 amps on its own. You can see immediately that if anything else of significance switches on while it’s charging, you’re going to have a problem — unless the system is managed.
What happens
during your day
The scenarios below show what your electrical system faces at different times of day. They’re simplified — actual consumption varies by appliance age and habits — but they illustrate exactly why load management matters.
These scenarios are illustrative. Actual consumption varies by appliance brand, age, and settings. A professional load assessment at your property will give you a precise picture before installation.
How to keep your home
within safe limits
The good news: the scenarios above are not problems you have to solve yourself. There are two established approaches to keeping your home’s power within safe limits once a charger is installed. Your electrician will recommend the right one — or a combination — based on your specific house.
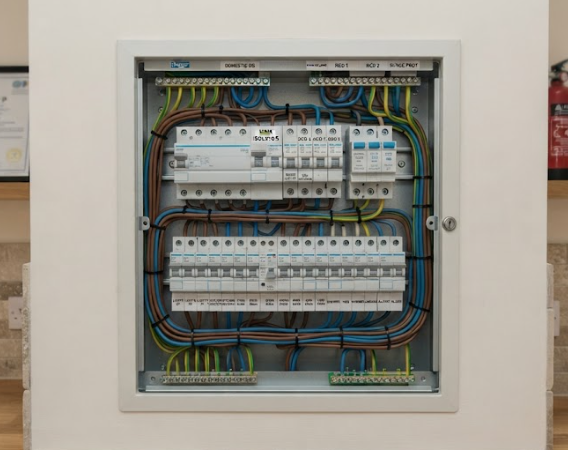
A small sensor called a CT (current transformer) clamp is fitted onto the main incoming cable inside your DB board — the electrical cupboard in your home. It watches the total amps flowing through your house, every second, without you doing anything.
A smart contactor (think of it as an automatic switch) is wired to a selected high-draw appliance — usually the EV charger, but it could equally be the geyser or pool pump. The two devices talk to each other: when the CT clamp sees the total power approaching your supply limit, the contactor automatically disconnects or throttles the chosen appliance before your main breaker trips.
When everything settles back down — the washing machine finishes, the stove turns off — the charger switches back on automatically. You don’t need to touch anything.
Some smart EV chargers can be set — either manually or automatically — to run at a lower power output. Dialling the charger down from 7kW to 3.6kW halves the current draw from 30A to around 16A. That frees up roughly 14 extra amps of headroom in your home, reducing the risk of your main breaker tripping when other appliances are running.
This can be a built-in setting on the charger itself, or it can be configured by your installer. Charging takes roughly twice as long, but for most people charging overnight, that doesn’t matter — the car is full by morning either way.
Every home is different, and the right solution for yours depends on how your house is already set up. A few examples that change the picture significantly:
This is why a site assessment matters — not to make the installation more complicated, but to give you the simplest, cheapest solution that actually works for your specific home.
Three critical
compliance factors
Before any EV charger is switched on, these three requirements must be satisfied. This isn’t optional — it’s the law under SANS 10142, South Africa’s electrical wiring code.
An EV charger circuit must have its own dedicated Type A Earth Leakage Unit (ELU) — also called an RCD. A standard domestic ELU may not be sufficient.
EV onboard chargers contain electronics that can produce a small DC fault current during a malfunction. An ordinary ELU can be “blinded” by this DC component and may not trip — even during a genuine shock hazard. A Type A ELU detects both AC and pulsed DC fault currents, closing that gap.
If your charger manufacturer’s datasheet confirms that the unit includes built-in 6mA DC fault detection (called an RDC-DD), a Type A ELU is sufficient. If not, a Type B ELU is required. Your installer will confirm which applies to your charger model.
Critical: The EV charger must be on its own dedicated ELU — never shared with other circuits in your home.
A 7kW EV charger draws approximately 30 amps — continuously — for hours at a time. This is very different from an appliance that cycles on and off. Undersized cable generates heat, causes voltage drop, reduces charging speed, and in the worst case, starts fires inside walls.
| Cable run distance | Required cable size | Verdict |
|---|---|---|
| Any length | 4mm² cable | ❌ Never acceptable for a 7kW charger |
| Under 25 metres | 6mm² copper | ✓ Minimum acceptable — standard installation |
| 25 metres or more | 10mm² copper | ✓ Required — manages voltage drop over longer runs |
If an electrician quotes 4mm² cable for your EV charger, regardless of distance, decline immediately. It is a corner being cut at your expense — and your risk.
Adding an EV charger to a non-compliant or overloaded DB board doesn’t just create a charging problem — it creates a safety hazard for the whole house. An older DB board might have undersized breakers, loose connections, or components that were already marginal before the extra load of a 32A charger circuit.
If the electrician finds that the existing DB board is not compliant during their site assessment, they are legally required to bring it to a safe and compliant standard before proceeding with the charger installation. This isn’t being difficult — it’s the law, and it protects you.
A Certificate of Compliance (CoC) must be issued on completion of all electrical work. Without it, your home insurance may not cover electrical faults, and you cannot legally sell your property. Always insist on a CoC, and keep it in a safe place.
Home Charging EV Buyers Guide